https://www.gamedev.net/blog/1930/entry-2261155-visual-scripting-basics/
Last time, I introduced you to the visual scripting system of my engine. I introduced you to the basics of the scripting system. The next important question is: How do you create a control flow? I've already talked about basic flow from node to node, but what about branches, loops, etc...? There are obviously some special nodes for that, which I'm going to show now:
Basic nodes:
Lets start with the very basic nodes, which make up functionality that is present in any imperative programming language.
Condition:
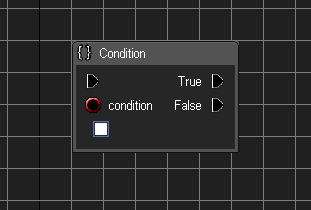
The condition node is the equivalent to a regular "if". It evaluates based on the attribute whether to execute the true or false branch.
ForLoop:

ForLoop does exactly what the name says, a loop which executes in the range of first to last index. The "body" graph is called for each iteration while "index" contains the current index. "Finished" is called after the last iteration.
WhileLoop:
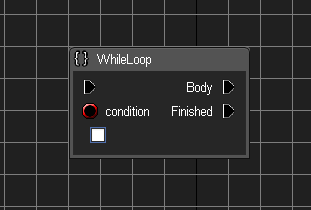
The next straight-forward node. Loops until "condition" equals false. This node essentially only works with an attribute connection present, otherwise you get an endless loop. This loop also has seperated body/finished outputs. There is currently no break available - its kind of hard to do this as a node, Unreals way is to have a "break" input, but I don't support multiple input pins yet, so maybe this is to come in the feature (probably when I really need it).
Those are essentially the basic control flow nodes. Some future includes might be a DoWhile (was kind of weird to implement before, with recent changes I could easily do it but will see if it is needed), probably a loop-break, while some other things like "continue", "goto" are not really needed and/or too complicated to implement. Now, before we look at some more advanced control structures, we need to get an essential concept of the scripting language out of the way:
Wildcards:
A wildcard is kind of the equivalent of C++ templates. Its used as a placeholder for any type, which means any attribute input can be connected to it, which will resolve the wildcard to a certain type. Wildcards have a special set of rules:
- A wildcard must be eigther declared array or non-array.
- A wildcard essentially operates on the four primary data types (POD, Object, Struct, Enum), and while it is possible to specialize a node for ie. a very certain object, its not really what they are for.
- A node can only have one wildcard type, meaning that the first connected attribute determines the type of all wildcard inputs, as well as outputs. Without this limitation, wildcards would be both very difficult to implement, as well as confusing to use.
You are going to see what a wildcard looks like in some of the control structures below. You will see that wildcards is a quintessencial concept really needed in a visual language like this, as otherwise you'd be struggeling to implement many functions over and over and over again for different types.
Advanced nodes:
Sequence:
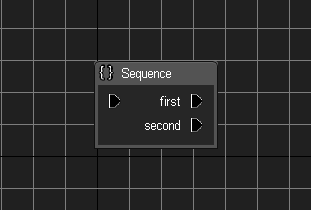
The first node which goes agains normal programming habbits is the Sequence node. Sequence does just that, execute its output pins one after another (this also includes waiting for timed nodes, etc...). This node is not really needed, as the same functionality can be achieved by directly connecting the last node of the "first" path to the first node of "second", but its vital to keep scripts ordered, since it allows you to decouple sequences of actions. This is primarily important since it makes extention of the script easier (which is an immanent problem with most visual scripting languages). Its kind of hard to explain if you haven't worked with a visual language before, so I'll try to give you a practical example:
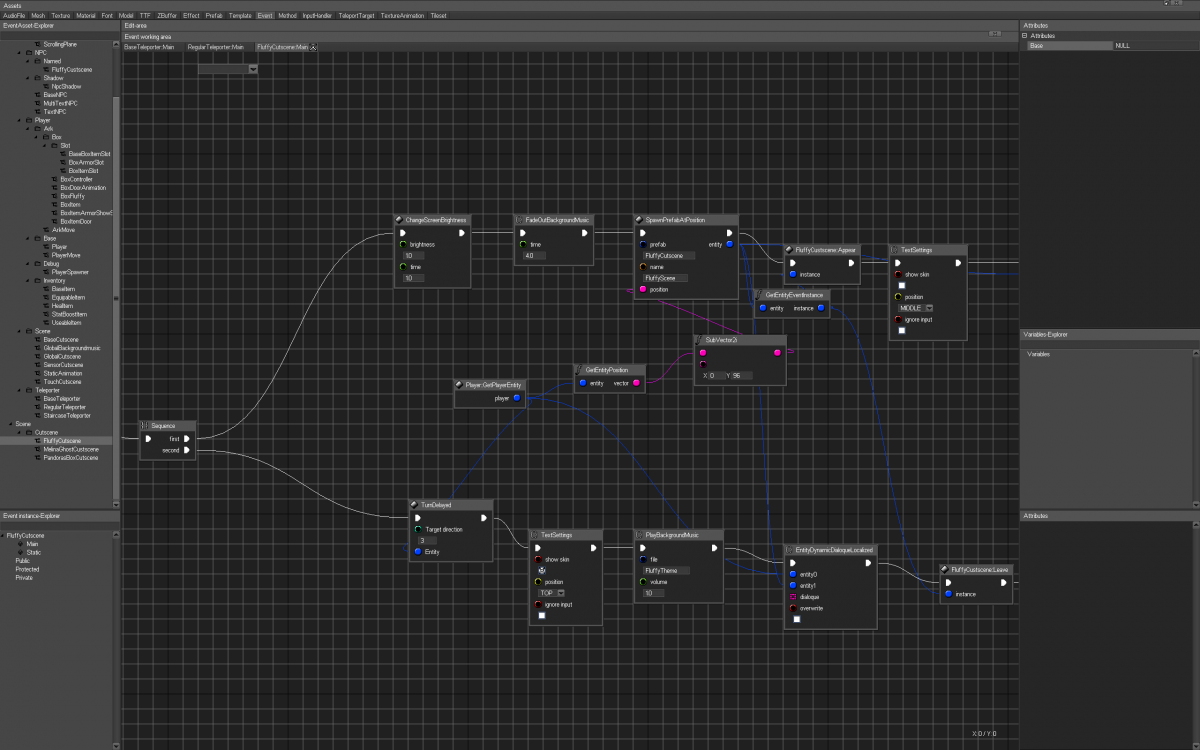
Looking at the script below, it controls two parts of a cutscene: A character appearing with an animation while music and screen fades; plus the player turning to the character and engaging in a conversation with him. If I didn't use sequence here, I would eigther have the control flow come from the far right event of the upper branch (which you can't even see now) to the "TurnDelayed"-node, which is very bad to keep overview of the script, as well as that it makes extention of scripts hard (if I eigther need to insert a node before TurnDelayed or after the upper right node, I'm screwed with having to draw a connection between nodes that aren't even on the same screen). I really noticed the difference between newer scripts vs. the cutscenes I designed right after I implemented the language (might post a screen of those here just for the shits and giggles). But enough of this simple node, lets continue.
ForEachLoop:

I already told you about the ForLoop. Now you could just use a ForLoop and direct array access with the index to simulate the "ForEachLoop", but its just much easier to have this one node if you want to iterate over the whole array at once. Here, you can also see a wildcard. Depending on what type of array is put in, the node will return the exact same type of single element. Index is also returned, in case it is needed for deletion etc..).
Parallel:
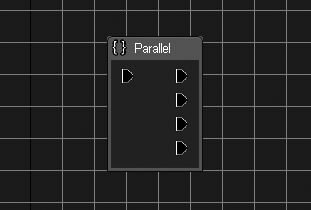
Now for the really neat stuff. Since the focus of my language lies on timed actions, you just cannot always execute nodes one after another. Imagine if you wanted to fade the screen as well as the music. Both nodes take a certain amount of time, meaning in a regular call graph you can only fade the screen AND THEN the music, or vise versa. But what if you want to fade them both at once? In comes this hand node, which really does what it promises: It executes all connected code branches parallelly. Yeah, its just simulated parallelism without multiple threads, but its behaviour is kind of the same (minus the need to care about shared state between threads). Some truly awesome things can be done with it, so its not just a product of having to deal with timed nodes, but more like an easy tool for simulated paralellism.
Block:
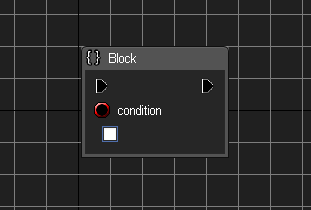
Another tool specially made for parallelism and timing, is the "Block" node. It blocks until the condition is fulfilled, meaning that once this node is called, the rest of the callgraph will be put on halt until said condition is met. Not only can this be used for synchronisation, but also ie. in combination with a while-loop to execute regular code independant of the tick trigger.
Conditional:

Pretty much just the equivalent to the "Condition ? X : Y" in C++, but since calculations aren't just part of the regular call flow, its used much more often. For example, in const-methods you can't even call any other non-const methods or call structures like "Condition", so for returning values based on condition from those, Condition is your thing to go with. One optimization I made for this node specially is the ability to only evaluate calculation nodes based on access, ie. if the conditional is "true", only the "true" variable will be accessed, potentially saving a lot of computation power (and also being more correct in case of nullptr-checks with conditionals; a problem which unreal has due to them always evaluating both paths).
SkipFrame:
A very minimal node with only one in/output, which I didn't make a screenshot for. Its main purpose is to avoid infinite loops by telling the current call graph to wait for the next frame, kind of like Unities coroutines. It can also be used to wait for values that are not present until the next tick, like ie. entities used to not be fully initialized until the next frame, which meant that if you wanted to create an entity and use some of its scripts functions, you'd have to SkipFrame.
________________________________________________________
So thats it for this time. I've given you an overview of some of the basic and advanced tools the scripting language has, which allows it to do pretty much everything other languages can, with some features specifically targeted at timed/parallel code. Next time, I'll be talking about the details behind this timing, and show some practical exampels of it being read. Thanks for reading!